Showing posts with label lunch. Show all posts

11 August 2014

Couscous Fritters {Leftover Makeovers}

I'm discovering a passion for using leftovers. Even when I am cooking something, I am thinking about what I'll be able to make that last uneaten portion into. Frugality at it's best I like to think. 

Last week, Jacob made some lamb and couscous for dinner. The lamb was perfect. So was the couscous. But there was a lot of it! He had made it with a mix of onions, garlic, silverbeet and currants. So yummy!

The next day, I had over a cup leftover in the fridge. So, I did what people tend to do with quinoa and such, Fritters!
The boy friendly lunch.
Couscous Fritters, baby cos lettuce with carrot 'slaw' and blackcurrant jam for dipping.
If you know how to make fritters, you can really make them from anything. Potatoes, kumara, mixed veggies, lentils, beans beans and more beans. It's all a bit to easy not to try. 

First, whisk the egg then mix in your couscous. Add in the breadcrumbs slowly, a little at a time and mix. You may need less or more depending on the texture of the couscous and what is in it already if you are using leftovers. 


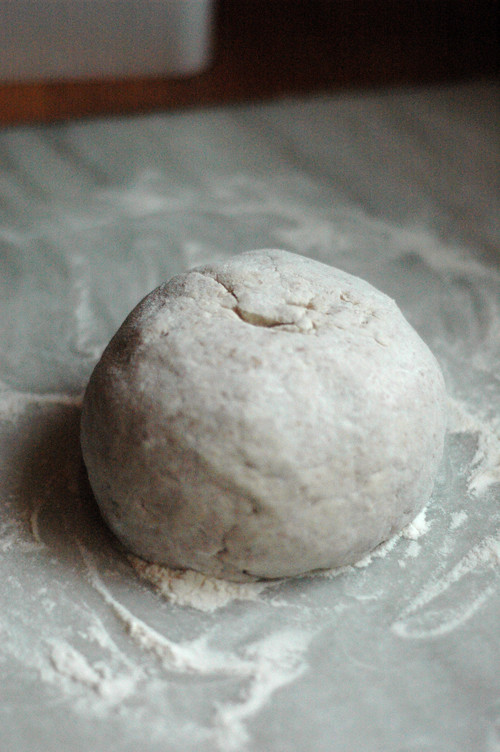
Add in the feta and let it crumble a bit and keep some pretty chunky. I love the texture of big bits of melted feta. Next, you want to be able to make them into balls with your hands and have them stay together. If this isn't happening and it's still too wet, add more breadcrumbs.


Heat up the pan with a bit of oil. I used regular canola oil for this one, but tend to do grapeseed oil when frying. Pop them into the pan and let them brown a little bit and then turn them and flatten a bit with a fork or a spatula. 


They should be browned a bit on each side, it's just the egg you need to make sure cooks through, so it usually won't take any longer than 4-5 minutes on each side. 

Drain them on a paper towel and serve 'em up! I was secretly hoping the boys wouldn't like them so I could have the whole lot, but no such luck. They were, sadly, a hit. 


print recipe

Couscous Fritters
Ingredients
  • 250 g (about a cup) cooked couscous, inc any yummy bits and pieces
  • 1/2 to 1 cup breadcrumbs
  • 1 egg, lightly beaten
  • 2-3 tbsp crumbly feta
  • 1/4 cup canola or grapeseed oil
Instructions

  1. First, whisk the egg then mix in your couscous. 
  2. Add in the breadcrumbs slowly, a little at a time and mix. You may need less or more depending on the texture of the couscous and what is in it already if you are using leftovers. 
  3. Add in the feta and let it crumble a bit and keep some pretty chunky. 
  4. You want to be able to make them into balls with your hands and have them stay together. If this isn't happening and it's still too wet, add more breadcrumbs.
  5. Heat up the pan with a bit of oil. I used regular canola oil for this one, but tend to do grapeseed oil when frying. Pop them into the pan and let them brown a little bit and then turn them and flatten a bit with a fork or a spatula. 
  6. They should be browned a bit on each side, it's just the egg you need to make sure cooks through, so it usually won't take any longer than 4-5 minutes on each side. 
  7.  Drain them on a paper towel and serve 'em up!
Details
Prep time: Cook time: Total time: Yield: approx 8 fritters

09 August 2014

A Week of Toddler Lunches

I wanted to document what we are having for lunch lately. It's been a pretty awesome change over the last year. There is something so cool about when your kids start eating "people" food. Or grown up food. Or at least a variation of it. Here is what they had last week ...

Tuna Melt on Vogel's Bread with baby cos and capsicum.
Hard boiled egg, hummus, carrot and capsicum, and an apple.
Couscous Fritters, baby cos lettuce and carrot 'slaw' with balsamic, and blackcurrant jam
Curry Kumara Puffs, pear, mixed beans and lettuce
*Mousetraps, mandarin, edamame, and mixed beans
Please note the *. This was a very, very special meal. The mousetraps were made by the boys. Mostly. They spread the vegemite on the bread with actual knives, placed the cheese on top, and only ate a few bits of it. They were so interested and excited when I took them out of the oven! It made my day! Also, this was their first day with edamame in their pods. They loved it! It was a bit of a challenge at first, but even today, Willem had the technique down pat! Totally aced it! 

I love that they are so keen to help and watch what is going on in the kitchen. I never remember being that excited, but then again, when I met met Jacob, the only thing I could cook was pasta and red sauce. True story. 

The more I involve them, the more interested they are. The mousetrap making was just awesome to watch. They are naturals in the kitchen! 

xx

04 August 2014

Fish Fingers and Trying Fighting School Holiday Boredom....

This past school holidays were slowly driving me a bit mental. It rained. It was cold. There were next to no playgroups and it was too crappy to go out anyway. So what did we do?

Yes. Yes. Yes.

Made Fish Fingers. 

I know. I know. 

Its the bane of so many mum's existence. But honestly, we never have them! So, it quite was a treat! 

We used about 400 grams of fish (I think it was groper) cut into easy to manage strips. 
Put it into a bag with 1/2 cup of flour. Shake it baby! (the boys loved this for about 5 seconds)
In a bowl, I combined equal parts shredded coconut and panko breadcrumbs with a little salt and pepper. Then (without egg, crazy I know!) put the coated fish into the coconut mixture. Press them in thoroughly and make sure it all sticks. It's easiest to do this in batches. Then in a shallow fry pan using grapeseed oil, fry them up until they are golden brown and cooked through. Drain on a towel and squeeze a bit of lime, good to go!


And while this was all going on, I was baking some chips in the oven and making some of my favourite tartar sauce via my childhood memory. I felt like a true mum (or Mom) when I made that. 
Mayo. Relish. Stir. 
It brought a tear to my eye and made desperately miss my Mom back in the states. 
It was a total 80's flashback lunch for me.
And the boys loved it. Especially the tartar sauce. 


Coconut Fish Fingers with Mom's Old School Tartar Sauce


Prep time: 10 mins
Cook time: 10 mins
Total time: 20 mins
Ingredients
  • 400 grams Groper (or any other hardy fish)
  • 1/2 cup flour
  • 1/2 cup desiccated coconut
  • 1/2 cup panko breadcrumbs
  • approx 1/3 cup grapeseed oil for frying
  • 2 tbsp mayonaisse
  • 2 tbsp gherkin relish
  • a squeeze of lime
Cooking Directions
  1. Cut the fish into easy to manage strips.
  2. Put the fish strips into a bag with 1/2 cup of flour. Shake shake shake!
  3. In a bowl, combine the coconut and panko breadcrumbs with a little salt and pepper.
  4. Then put the coated fish into the coconut mixture.
  5. Press them in thoroughly and make sure it all sticks. It's easiest to do this in batches.
  6. In a shallow fry pan using grapeseed oil, fry them up until they are golden brown and cooked through.
  7. Drain on a towel and squeeze a bit of lime, good to go!
  8. Mix the mayo and relish together and serve on the side for yummy dipping action.


xx

02 April 2014

Chicken Quinoa Enchiladas

Someone in our family, who shall remain anonymous, isn't too keen on quinoa. And ok, I can see why... it does have a different flavour and the texture needs a little getting used to, but the rest of us don't have a problem with it. So, when I made my last batch of chicken enchiladas, I wanted to try a little experiment...

They look like normal enchiladas, yeah?
And I think it worked! He ate it! And liked it! I thought it was hard to get the boys to eat some days, but getting that man to eat quinoa... Woooooo! I never thought it would happen!

Here's the successful sneaky quinoa recipe...

26 October 2013

The best ever Crusty Bread!

I have always been intimidated by baking. Especially bread. I have watched River Cottage in awe so many times determined to get over my fears and take it on with gusto! That never quite happened. 

But, in my many random Pinterest travels I came across this amazing recipe! I read through the instructions about 15 times before I decided to jump in. That's me. Research, memorise, then go. Well, most of the time. Otherwise, known as procrastination. 

But I did it! My first loaf was ok. Second loaf was better. By the 5th, aced it. Lucky I like bread! Lucky that even though Jacob doesn't like bread, he loves this! And the boys love it as well - especially with cottage cheese or covered in hummus.

So, my version of it after a few tries goes a little something like this...
  • 2 cups plain flour
  • 1 cup whole wheat flour
  • 1 3/4 tsp salt
  • 1/2 tsp active dry yeast
  • 1/4 cup lukewarm water
  • 1 1/4 cups additional water
In the 1/4 cup of lukewarm water, sprinkle in the yeast and let it stand while you get the rest of the ingredients together. 

In a big mixing bowl, whisk together the flours and the salt. With a handy dandy rubber spatula, slowly add in the yeasty water. Then slowly add the rest of the water. It will be a messy looking hunk of dough, but that's fine.

Cover the bowl with plastic wrap and leave overnight on the kitchen bench, at least 12-18 hours. Of course depending on the temperature of your kitchen overnight, it might be best to bring it to bed with you. It's an attractive move - coming to bed with a bowl of dough. Actually, just leave it on the night stand or a dresser. Trust me. 

In the morning, the bread should have risen to at least double. 

Pop a enamel cast iron oven friendly covered pot into the oven and crank it to 230 C (450F). I use one of our Le Creuset pots, but apparently you can use a variety of things. Just think Dutch Oven. (No, not THAT kind of Dutch Oven...) Check out the FAQ's for more info on the Simply So Good blog on the pots you should be able to use.

As it's heating, I pop the dough out onto a floured surface. It will be stick as, but it usually stays together nicely. So, with very floury hands, shape the dough into a good looking ball and put the plastic wrap back over it. 
Once the pot is hot, take it out of the oven, CAREFULLY and with good oven mitts! I finally burned my index finger just on Friday for the first time, and it hurts like a you-know-what! Pop the dough into the pot, put the cover back on and back in the oven it goes. 

This is when I have all of my not-so-reliable kitchen timers set to 30 minutes. 
After 30 minutes, take the lid off (CAREFULLY) and cook for another 15 minutes. 

And that's it!! 

The hardest part is waiting for it to cool down. Seriously!

I've had it as sandwich bread, toast, french toast, with olive oil and balsamic. It's really lovely. And of course, the boys love it!

Enjoy!!
xx